
Photos: https://www.flickr.com/photos/brijsman/albums/72177720303866936
In the Sierra Norte mountains, just north of the beautiful colonial city of Oaxaca, you can find one of the few multi-day hiking opportunities in Mexico.
Six tiny villages joined forces and started an exemplary community eco-tourism project under the name “pueblos mancomunados” (literally “joint villages”):
- Benito Juárez
- Cuajimoloyas
- La Neverìa
- Latuvi
- Llano Grande
- San Miguel Amatlàn
They built and marked more than 100 kilometers of trails to interconnect the villages through the mountains, forests, and fields. They also offer tourist quality accommodation in each village and guiding services.
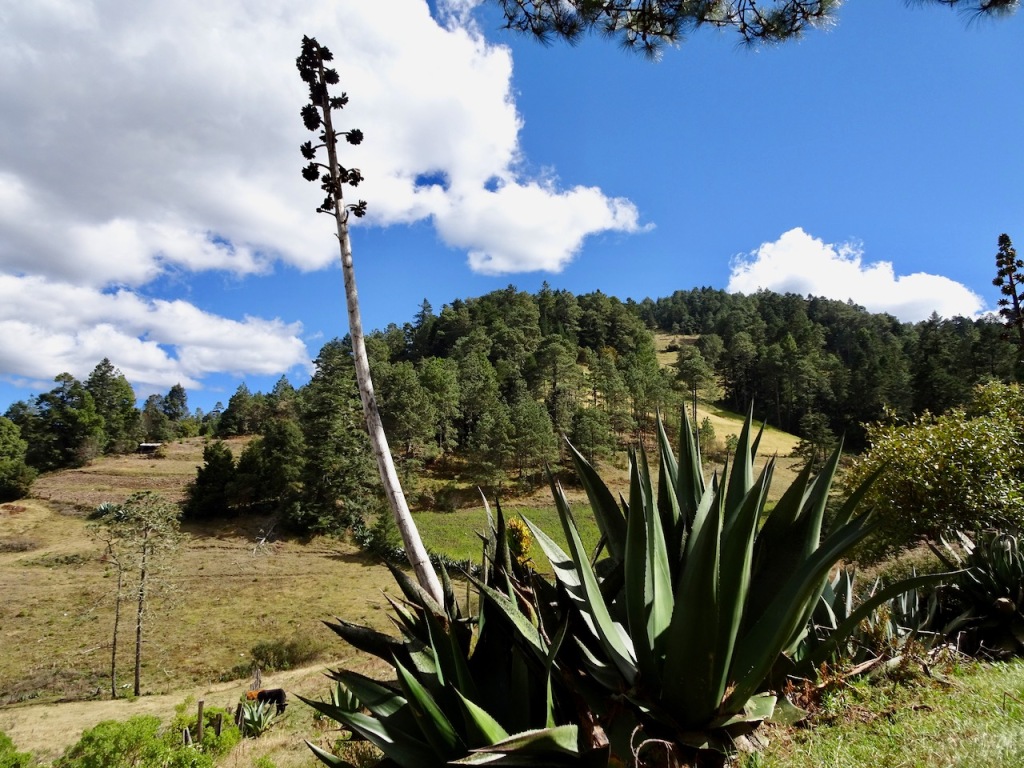
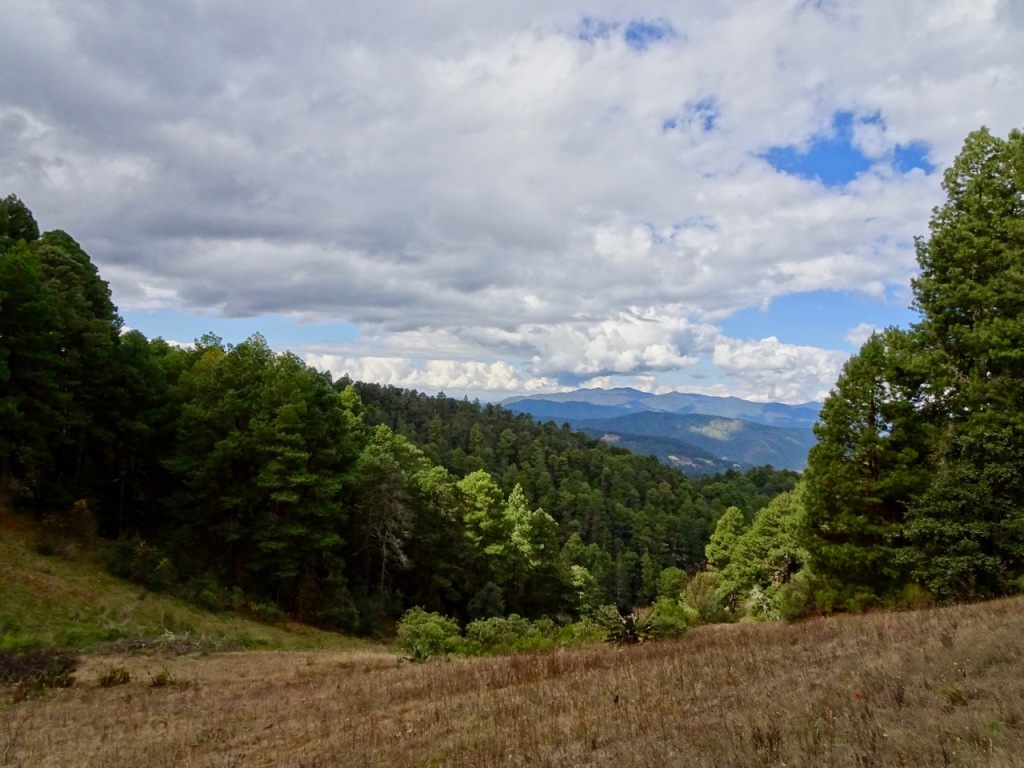
It is an absolutely lovely hike: a combination of rolling green mountains interspersed by fields and small villages. The hike is quite easy – the distances between the villages are not too large, you can hire guides to help you find the way, and each village has truly excellent accommodation and restaurants, so you only need to carry a light day pack.
You can kick the challenge up a notch by combining multiple sections into a single day and by hiking most of the sections by yourself without a guide.
Itinerary
Our route diverges quite a bit from the “standard route” in two ways:
Firstly, we prefer to hike long full days. The distances on the standard route were too short for our taste. So, on most days we combined what the normal itinerary does in two days into a single day.
Secondly, most people take the bus or a taxi from Oaxaca to Cuajimoloyas (which is already up in the mountains) and start hiking from there. We took a different route: we started in Tlalixtac and hiked up to La Nivería. This is a route that very few people take. It is a bit tougher than the usual route because you start much lower and there is quite an ascent to cover. But it is very worthwhile because it is much more off-the-beaten track and it takes you through a magic forest with lots and lots of orchids and bromelias.
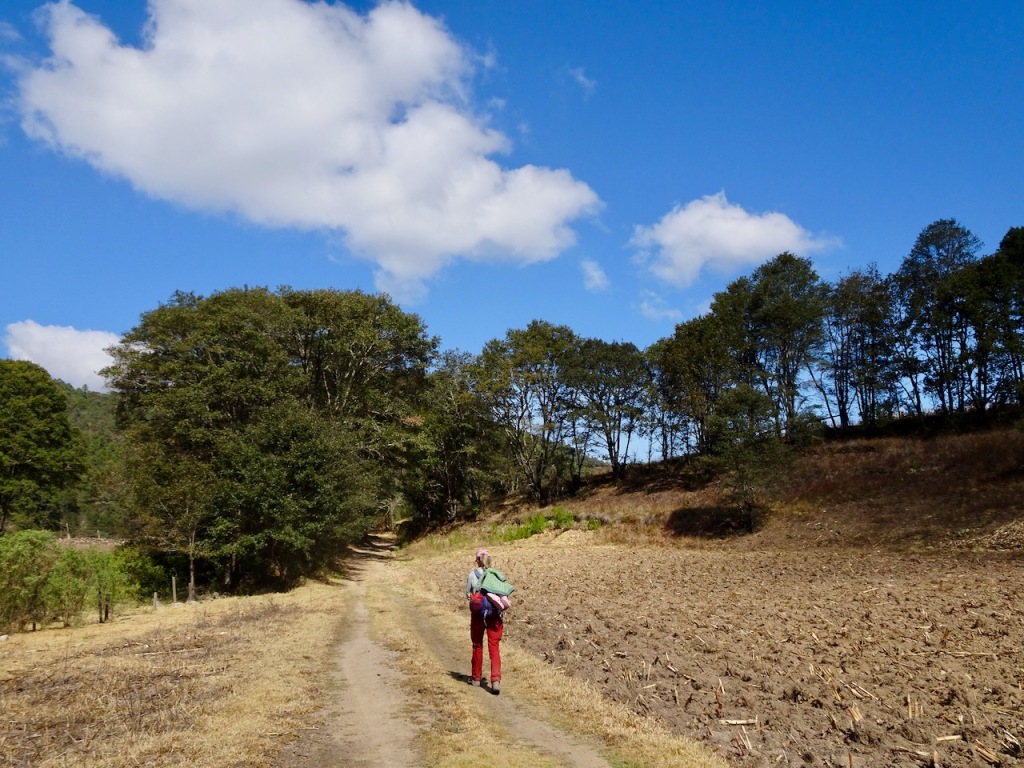
Day 1 (10 January 2019): Tlalixtac – La Nevería
17km, 1300m elevation gain. Tlalixtac is situated at an altitude of 2800 meters.
We meet our guide in Tlalixtac at 9am; he had left La Nevería and started down the mountain at 4am in order to meet us on time in Tlalixtac. After heading out of the village over dirt roads we head up into the mountains through an amazingly beautiful forest full of orchids and bromelias. La Nevería is known for its big greenhouses full of watercress. It has very beautiful cabañas, and basic food. The community also offers a wider variety of activities (book in advance). There are no markers along the way.


Day 2 (11 January 2019): La Nevería – Benito Juárez – Cuajimoloyas
La Nevería – Benito Juarez: 9km / 556m elevation gain.
Benito Juarez – Cuajimoloyas: 7km / 600m elevation
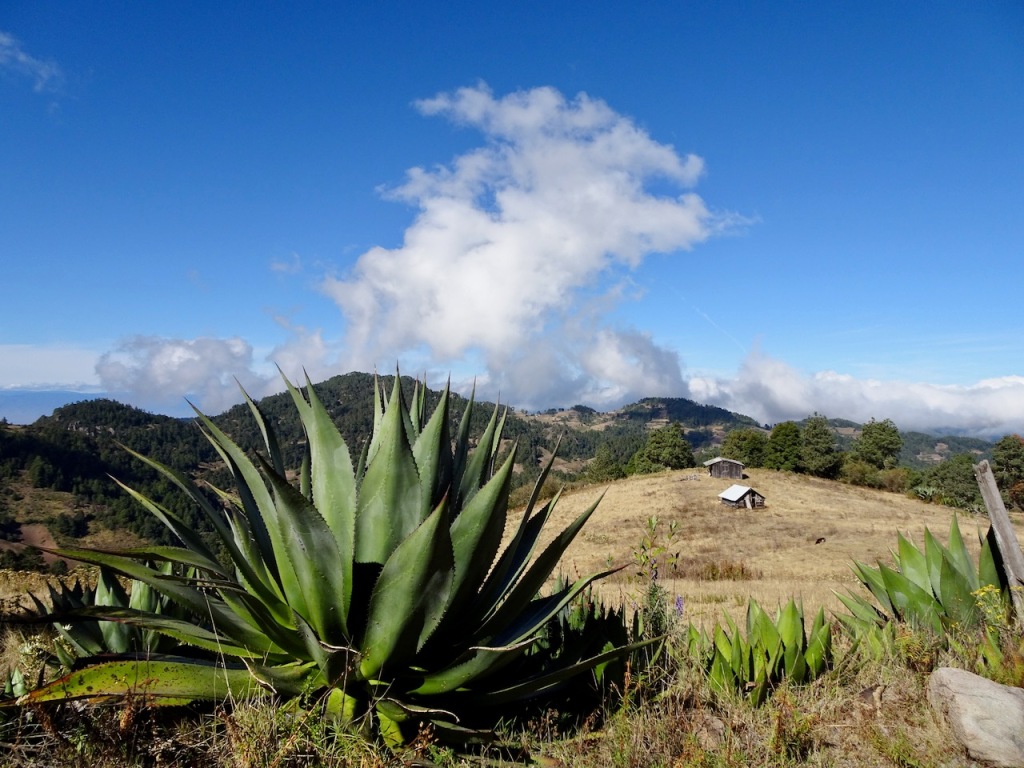
This is a very nice, varied and charming stretch. There are many big maguey agaves along the the way and many good views of the farming country side. Outside of La Nevería the route through the forest is poorly marked. When we get to Benito Juarez we take a tuk-tuk to skip a section of paved road part. The section between Benito Juarez and Cuajimoloyas is very beautiful and rugged but has difficult route finding in some parts.


Day 3 (12 January 2019): Cuajimoloyas – Latuvi
16km / 300m elevation gain.
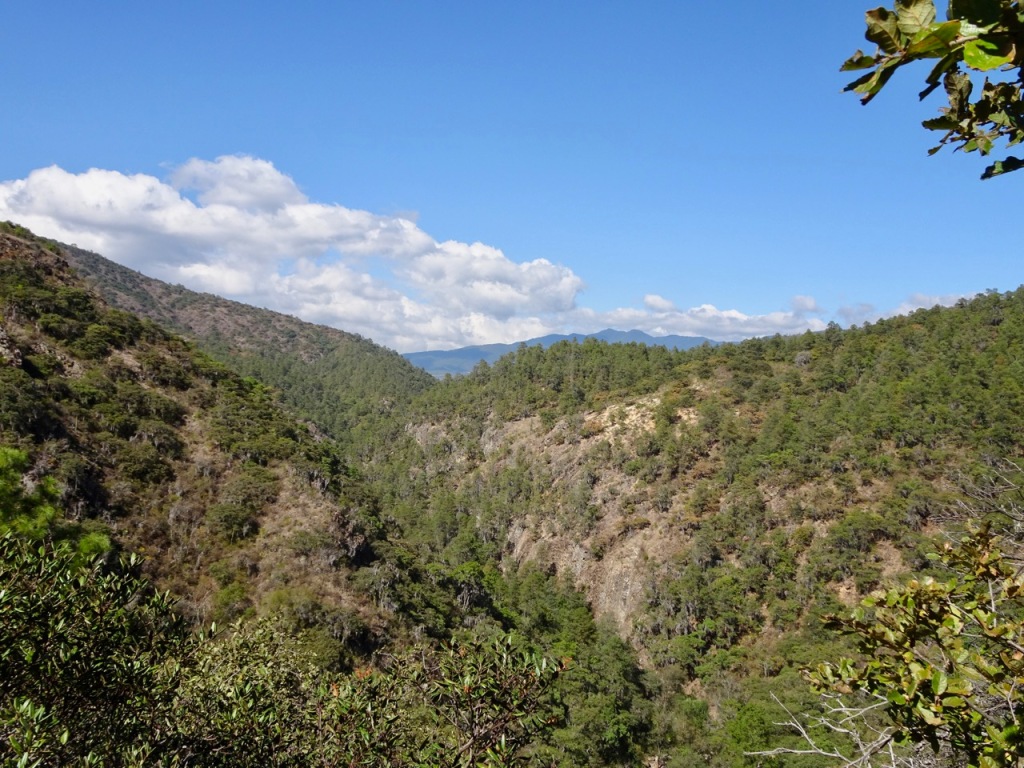
On this stretch it looks like the markers have been taken down. We were told that this was done so the local guides would not loose their jobs. We start on dirt roads out of Cuajimoloyas, and continue over a high ridge through moss forest up to a view point. We reach a rocky outcrop where we unsuccessfully try to send back a dog that followed us. If you take a guide, this is where the guides from Cuajimoloyas and Latuvi will switch places. From here you walk down to the river and then back up. There is a very welcoming tourist office in Latuvi. You can get delicious trout in the restaurant across from the cabins/tourist office. Note: there are apparently two roads to Latuvi, one over the main road which is not very interesting and the one we took – which is definitely nicer but also much more difficult to find.


Day 4 (13 January 2019): Latuvi – Lachatao / San Miguel Amatlán
16km / 800m elevation gain.
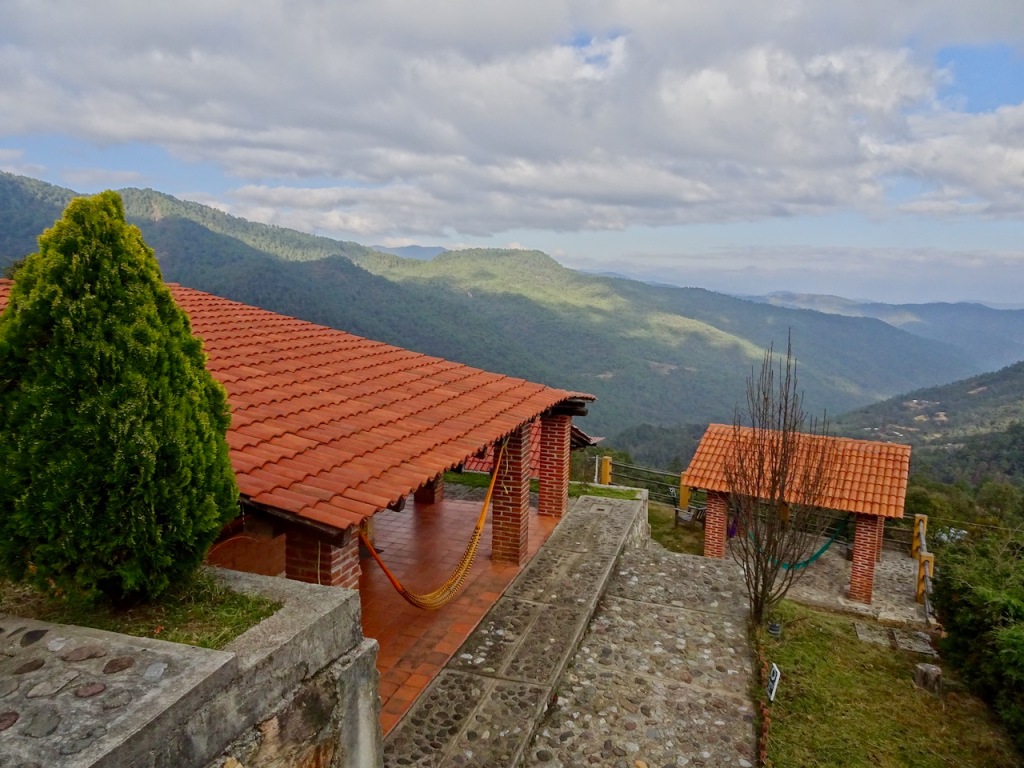
Today’s route doesn’t start out very promising: it is a rather boring path following a river and going through agricultural fields. But it soon changes into an absolutely beautiful stretch that turns out to be our favorite part of the entire hike: el camino real. It follows another river, with beautiful moss forests and views. Highly enjoyable. Lachatao is a cute little town (ask in the tourist office for the key of the church and the museum) from where you can see Amatlan. It’s close-by but you have to go up through the cemetery. Try to get one of the free-standing cabañas, the attached ones are open at the top and are noisy if the neighboring cabaña is occupied. The dining hall is very big and a little bit sterile.


Day 5 (14 January 2019): Amatlán – Llano Grande
24km / 1300m elevation gain
We take a guide for this stretch; it is not mandatory but it is a long stretch and we are not quite sure of the trail . The weather is rainy and cold; not the best day. On top of that the section is not the most beautiful. Our guide does his best to pick hiking trails and avoid the dirt roads but there was still a lot of dirt road walking to our taste. The management at Llano Grande is kind of “strict” (when I asked and wanted to pay for some extra wood I was told that I should put another blanket around me). There is a cute and delicious restaurant on the main road around the corner from the cabins.


Day 6 (15 January 2019): Llano Grande – Cuajimoloyas (southern route)
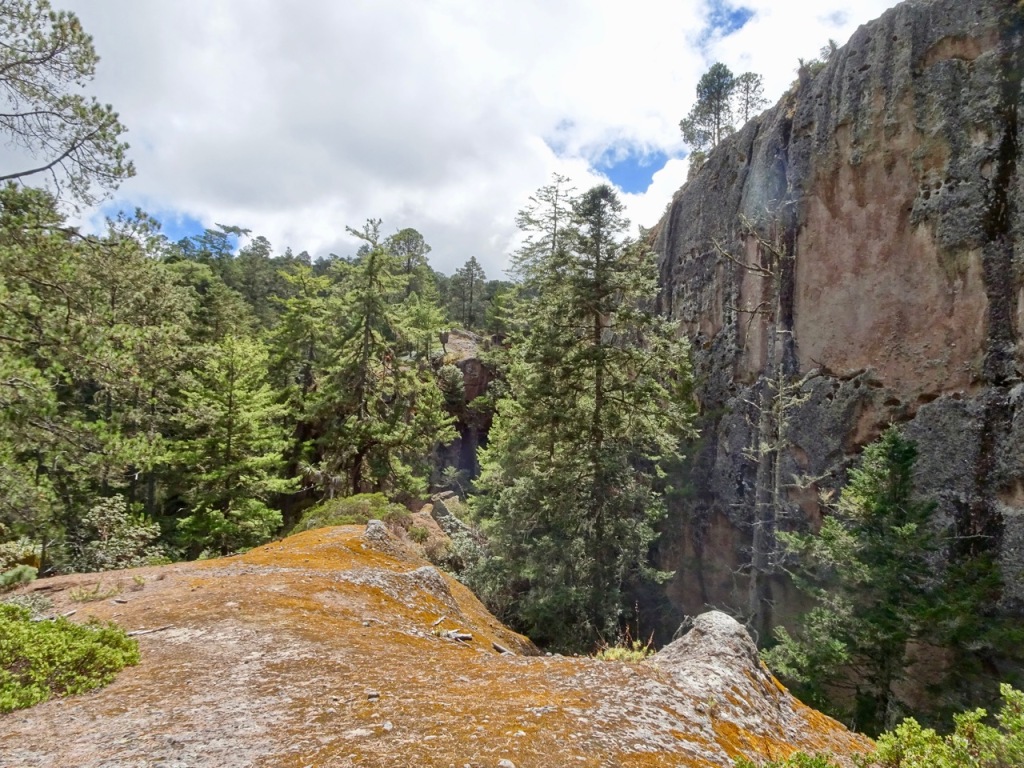
A guide is mandatory on this section because it is a protected area. He follows the trails to the local highlights. The first highlight is a big grassy field next to a lake where people come on Sundays to picnic and pay tribute to a holy virgin in the local chapel. It’s nice but a bit touristy and artificial for our taste. The second highlight is a canyon with some caves which are more impressive. Eventually, we end up in Cuajimoloyas (we were here before).


Day 7 (16 January 2019): Cuajimoloyas local loop.
On our last day, we walk the local trails in the area around Cuajimoloyas. We found one little loop past a little trout pond and then into a canyon. It was nice but very short – not nearly enough to fill a day. Then we visited Mirador Xi-Nudaa, and still have lots of energy and time left. We tried to find a longer loop, walking over the dirt roads, but we could not find anything interesting. In the end we got frustrated and hitch-hiked back to town on a passing truck…


Logistics
Website
The official website is at https://sierranorte.org.mx/. You are not limited to the 7 day / 6 night package that is listed here: if you visit the office you can put together a route that fits your available time, interest and ability.
Office
The pueblos mancomunados operate an official office where you can get information and book accommodation and guides. The staff is super knowledgable, friendly, and reliable.
The office is run by the villages themselves: all income goes to the villages and they charge the same official prices that you would pay in the villages themselves.
The office is called “Operadora Turistica Pueblos Mancomunados” and it is located at Calle de Manuel Bravo 210, Ruta Independencia, Centro, 68100 Oaxaca.
It is not mandatory to book accommodation in advance, but in the high season it is advisable because each village only has a limited number of cabins and it can get busy in the high season.
Costs
The prices, as of January 2019 were:
| Access fee | 60 pesos per day per person |
| Private cabin for 2 people | 550 – 610 pesos per cabin |
| Firewood in cabin (you need this in winter) | Sorry, I forgot… maybe 100 pesos per load? |
| Guide | Prices per group: 175 pesos up to 3 hours 235 pesos up to 5 hours 330 pesos up to 7 hours |
| Food | Normal prices, same as a simple restaurant in Oaxaca. |
What to bring
- Good hiking shoes or boots.
- Rain jacket, rain paints, and pack cover in case it rains.
- In winter: warm clothing, including jacket, gloves and hat. The trek is at a fairly high altitude (3200 meter). It definitely gets freezing cold at night. If it is foggy or if it rains it can even get freezing cold during the day.
- Water bottles. You can fill them with water in the morning when you leave. You cannot get water along the way on most days.
- Cash. There are no ATMs.
- You don’t need to bring a sleeping bag; there are clean sheets and warm blankets and fire places in all of the cabins.
- You don’t need to bring food (except maybe snacks for along the way). There are simple restaurants in each village where you can buy breakfast, dinner, and snacks or pack-away lunch.
Route finding: guide or no guide?
A common question is: do you need a guide or can you find the route by yourself? The short answer is that it is recommended to take a guide for the village-to-village sections, and most people do. There are also shorter loops close to each village that most people do by themselves without a guide.
That said, personally, we prefer to walk by ourselves without a guide. It’s not a matter of cost (the guides are actually very reasonably priced) but it’s because we like the peace, quiet, and solitude of being by ourselves without any one else around.
On a few sections, a guide is mandatory, so we hired guides for those sections (Day 6: Llano Grande – Cuajimoloyas). The guides actually turned out to be very friendly and knowledgeable (most of them only speak Spanish, though).
On one section (day 5: San Miguel Amatlan -> Llano Grande) we hired a guide just because it was a very long day and we weren’t sure whether we would find the trail.
For the remaining sections, we hiked by ourselves without a guide. It is definitely possible but I would only recommend it if you are very experienced with route finding and if you prepare very well.
First off all, there are several sections where the trail is very difficult or even impossible to find the route by yourself if you rely only on markers or on the paper map provided by the office.
The paper map is extremely basic and not at all suited for detailed navigation.
Officially, all trails are well marked. In reality, the trails are often very non-obvious and the amount of markings varies a lot. Some sections are indeed well marked. On other sections, however, the markings are either very far between or non-existent. We almost got the impression that some villages had purposely removed the markers to “encourage” hiring a guide. There are many splits in the trail without any indication of which way to go. There are a few sections where the “trail” is very faint.
We used a smartphone application called Wikiloc for GPS route finding. Using this app people who walk a hike can record their hike, publish the recording and share it with others. Other people can then download the recording and follow it. We found recordings for most of the sections of the trek (see list below).
Before you even attempt to to do this yourself, please consider these DISCLAIMERS first:
- The Wikiloc application is free, but you must purchase a subscription to be able to follow the recorded paths offline. You will need this – there is no Internet coverage on the trail.
- You must download all trails before you set off on the trek while you still have Internet in Oaxaca.
- Make sure that you are familiar with the Wikiloc application before you start. The application is very difficult to use and crashes frequently. Trying to figure out how to use it on the trek itself is a not a good idea.
- Never rely only on your phone for route finding. Always carry a battery bank for backup power. Even then, be prepared for running out of power at the worst possible moment. (You can recharge in the cabins in the vilages.)
- In general, always also carry a map. In this case that’s not so easy: a basic map is for sale at the office, but it’s no good for detailed navigation.
- Always keep track of where you are going so that you can return to where you came from if you get lost.
- The Wikiloc tracks are not always accurate. Even when the Wikiloc tracks are accurate they are not always easy to follow. Keep in mind that the Wikiloc tracks are not official routes. They are recorded by normal hikers just like you and me. They sometimes wander off in strange directions.
- Keep in mind that the Wikiloc route may be recorded in the reverse direction of what you are hiking. There is an option in Wikiloc to follow a recording in reverse.
If you are at all unsure about your route finding skills, hire a guide: they friendly and knowledgable and reasonably priced.
If you still want to use Wikiloc after all these warnings, here are the recordings that we used:
Day 1: Tlalistac -> La Neveria
- Could not find any Wikiloc recordings for this section. It is not part of the “normal” route. A guide is recommended.
Day 2: La Neveria -> Benito Juarez -> Cuajimoloyas (7 + 7.5 = 14.5 km)
- First part, forward, correct route (northern route): 4.9 mi
https://www.wikiloc.com/hiking-trails/sierra-norte-de-oaxaca-quinta-etapa-la-neveria-benito-juarez-21498509 - First part, forward, correct route (northern route): 4.5 mi
https://www.wikiloc.com/hiking-trails/la-neveria-benito-juarez-21498507 - First part, forward, correct route (northern route): 5.1 mi
https://www.wikiloc.com/hiking-trails/la-neveria-a-benito-juarez-20965922 - First part, forward, wrong route (southern route): 5.2 mi
https://www.wikiloc.com/hiking-trails/neveria-benito-juarez-24673910 - Second part, forward, correct route (northern route): 4.8 mi
https://www.wikiloc.com/hiking-trails/benito-juarez-a-cuajimoloyas-20965915 - Second part, backward, correct route (northern route): 4.3 mi
https://www.wikiloc.com/hiking-trails/cuajimoloyas-benito-juarez-20557571 - Second part, backward, correct route (northern route): 5.6 mi
https://www.wikiloc.com/hiking-trails/chuajomoloyas-benito-24673908 - Cuajimoloyas town info: https://www.sierranorte.org.mx/#/centro/5
Day 3: Cuajimoloyas -> Latuvi (16 km)
- Forward, correct route:
https://www.wikiloc.com/hiking-trails/cuajimoloyas-latuvi-15964663 - Forward, correct route:
https://www.wikiloc.com/hiking-trails/cuajimoloyas-a-latuvi-por-camino-y-sendero-31300041 - Forward, similar route but more over highway (not recommended):
https://www.wikiloc.com/hiking-trails/cuajimoloyas-to-latuvi-22402696 - Latuvi town info:
https://www.sierranorte.org.mx/#/centro/2
Day 4: Latuvi -> San Miguel Amatlan (14 km)
- Forwards:
https://www.wikiloc.com/hiking-trails/latuvi-amatlan-30809487 - Forwards: 9.6 mi
https://www.wikiloc.com/hiking-trails/latuvi-amatlan-20557606 - Backwards:
https://www.wikiloc.com/hiking-trails/amatlan-latuvi-12755159 - Backwards:
https://www.wikiloc.com/hiking-trails/amatlan-la-tuvi-21498508 - Amatlan: local loop (las minas)
https://www.wikiloc.com/hiking-trails/amatlan-las-minas-20557563 - San Miguel Almatan info:
https://www.sierranorte.org.mx/#/centro/1
Day 5: San Miguel Amatlan -> Llano Grande (23 km)
- Backwards: 12.5 mi
https://www.wikiloc.com/hiking-trails/llano-grande-amatlan-12741849 - Backwards: 13.6 mi
https://www.wikiloc.com/hiking-trails/sierra-norte-de-oaxaca-segunda-etapa-san-isidro-llano-grande-san-miguel-amatlan-21455565 - Backwards: 14.1 mi
https://www.wikiloc.com/hiking-trails/san-isidro-llano-grande-san-miguel-amatlan-21442670 - Llano Grande town info:
https://www.sierranorte.org.mx/#/centro/6
Day 6: Llano Grande -> revisit Cuajimoloyas (southern route, ? km) (guide mandatory)
- Forwards (normal route, not southern route) 5.6 mi
https://www.wikiloc.com/hiking-trails/llano-grande-a-cuajimoloyas-15964665 - Llano Grande, side trip to “Cascada” 5.0 mi
https://www.wikiloc.com/hiking-trails/cascada-llano-grande-15964667 - Llano Grande, side trip to “La Sepultura” 5.9 mi
https://www.wikiloc.com/hiking-trails/llano-grande-la-sepultura-20557621 - Llano Grande, local loop: 3.8 mi
https://www.wikiloc.com/hiking-trails/sierra-norte-de-oaxaca-primera-etapa-llano-grande-21440387 - Cuajimoloyas town info:
https://www.sierranorte.org.mx/#/centro/5
Day 7: Cuajimoloyas northern loop (? km)
- Local loop: Canon del Coyote Cuajimoloyas 3.6 mi
https://www.wikiloc.com/hiking-trails/canon-del-coyote-cuajimoloyas-15964664 - Local loop: Ecotrails 7 mi
https://www.wikiloc.com/hiking-trails/ecotrails-in-cuajimoloyas-oaxaca-mexico-316217 - Local loop: Trail matutino cuajimoloyas 7.2 mi
https://www.wikiloc.com/hiking-trails/trail-matutino-cuajimoloyas-17661970

Normally I only read blogs without commenting, but I have to tell you guys how much I appreciate that. It’s a really nice explanation about the whole experience and possibilities.
One other question is that even though we like the idea of supporting those villages we’re at a low budget and for us the best multiple day hikes are the ones that includes our own accommodation (tent), so do you know if there are accessible rivers where we could filter water from and do you think it’s possible and tolerated by the locals to do it by tent (not necessarily on campgrounds). We also have a campervan that we would like to park along the trail so because we don’t love backtracking we might skip the la nevería part and park our car somewhere in one of the accessible cities like Cuajimoloyas, Benito Juárez or Lachatao. Do you think it’s easy and cheap to park our car in one of those websites (in which one)?
If you can’t answer one of this questions we might anyway contact the tourist office in Oaxaca about that stuff, but I couldn’t read all your information without sharing my thank and my appreciation. 🙂
LikeLike
Hi Arne,
Glad you enjoyed the write-up!
I don’t know for 100% sure, but I do not think that the village locals would have any objections to you setting up your own tent in the area around the official cabins. You could cook yourself or you could still use the restaurant facilities. I suspect that they will likely charge you a camping fee, but it is likely going to be much less than the 550 pesos fee for a cabin. I am sure that the very friendly folks at the Oaxaca office can tell you exactly how much (if anything) the camping fee is.
If you are very adventurous you could possibly also camp “in the wild” in the middle of nowhere between the villages. It is certainly remote enough that no one would notice you if you go a few hundred meters off the trail. On the other hand, you might end up camping on someone’s private land without permission, which might cause problems.
Two things to keep in mind. (1) There is an access fee of 60 pesos (3 dollars) per person per day that you have to pay no matter what. (2) It gets extremely cold at night so make sure you have excellent sleeping bags (I would recommend down to -20 Celcius to be comfortable).
We saw very few rivers or other sources of drinking water along the way. Those that we did see are probably safe enough if you filter or chemically treat your water and take the usual precautions into consideration: not to close to villages or cattle etc. But the problem is more that the area is quite arid, so not many rivers to take water from. You are probably better off filling up at the villages – we drank the water from the tap without any treatment.
I have no idea about parking. I imagine you can just park your van on the street in one of the villages with road access. If you are concerned about theft, you could park it in front of a local business and pay them some money to keep an eye on it. I did not see any official parking lots. These are TINY villages.
Have fun!
LikeLike
Hey Arne,
I’m in Oaxaca with my boyfriend at the moment and we are also planning the hiking trip on low budget. Now our question is how you managed to do the trip low budget. Could you find good camping spots in the wild? Did you get in trouble with any land owners? Or how much did you have to pay to camp close to the cabins? And was it accepted? And if you camped in the wild was it easy to find places before reaching the villages or is it better to find a place after going through the villages. Maybe you have the spots still marked on your phone?
And also could you do most of the tracks without a guide?
Would appreciate any help!
Thank you 🙂
Eva and Philipp
LikeLike
Hey Arne,
I’m in Oaxaca City at the moment planing the same hiking trip on low budget with my boyfriend. So we have a couple of questions. Was it easy to find good places to wild camp? Is it easier before or part a village? Did you maybe save the spots on your phone? Was camping accepted by the people living there? Or did you get in trouble with any land owners? And how much did you pay for camping close to the cabins? And were you allowed to use a shower or toilet?
And our last question is about the trail if you managed to walk them or most of them without a guide or did you get lost a lot because the way it nor really easy to see? And did you use the GPS data from Bruno to find the way?
Thank you so much ahead!
Eva and Philipp
LikeLike
You replied to this comment.
LikeLike
Thank you! It’s been a while, so I forgot the details. But as I recall, there are decent bus connections to the larger villages (from where you can do nice walks). But the smaller villages have either no bus connections at all or very infrequent bus connections (maybe once per day only). I would recommend checking with the office in Oaxaca (the exact address in the blog post) and ask them for the bus schedule. They are very knowledgeable and friendly there.
LikeLike
Hi Bruno, I am so excited to read all your posts. I just met you and Tecla at the Avon in Silverton.
I have been taking friends hiking (mostly in Europe) for more than 20 years and have had this hike on my “radar” for years.
So fun to read your thoughts about it. Thanks!
LikeLike
Hi Susan! It was nice talking to you in Silverton. The Pueblos Mancomunados hike is really fun; I hope you get around to doing it.
LikeLike